Creating Cinematic Product Photo/Videos with AI
Product visualization has always been one of the most resource-intensive aspects of e-commerce and marketing. Traditional photography requires multiple angles, proper lighting, expensive equipment, and skilled photographers. But what if you could generate professional product videos using AI—starting from just a single product image?
In this post, I'll walk you through my experimental workflow that combines multiple AI tools to create seamless, cinematic product videos. This isn't just theory—it's a real-world application I tested using Weavy AI and other cutting-edge tools.
The Challenge
I wanted to see if I could take a single product image and transform it into a professional video showcasing multiple angles with smooth camera movements. The goal was to create something that looked like it was shot in a professional studio, but generated entirely through AI.
The Workflow: Step by Step
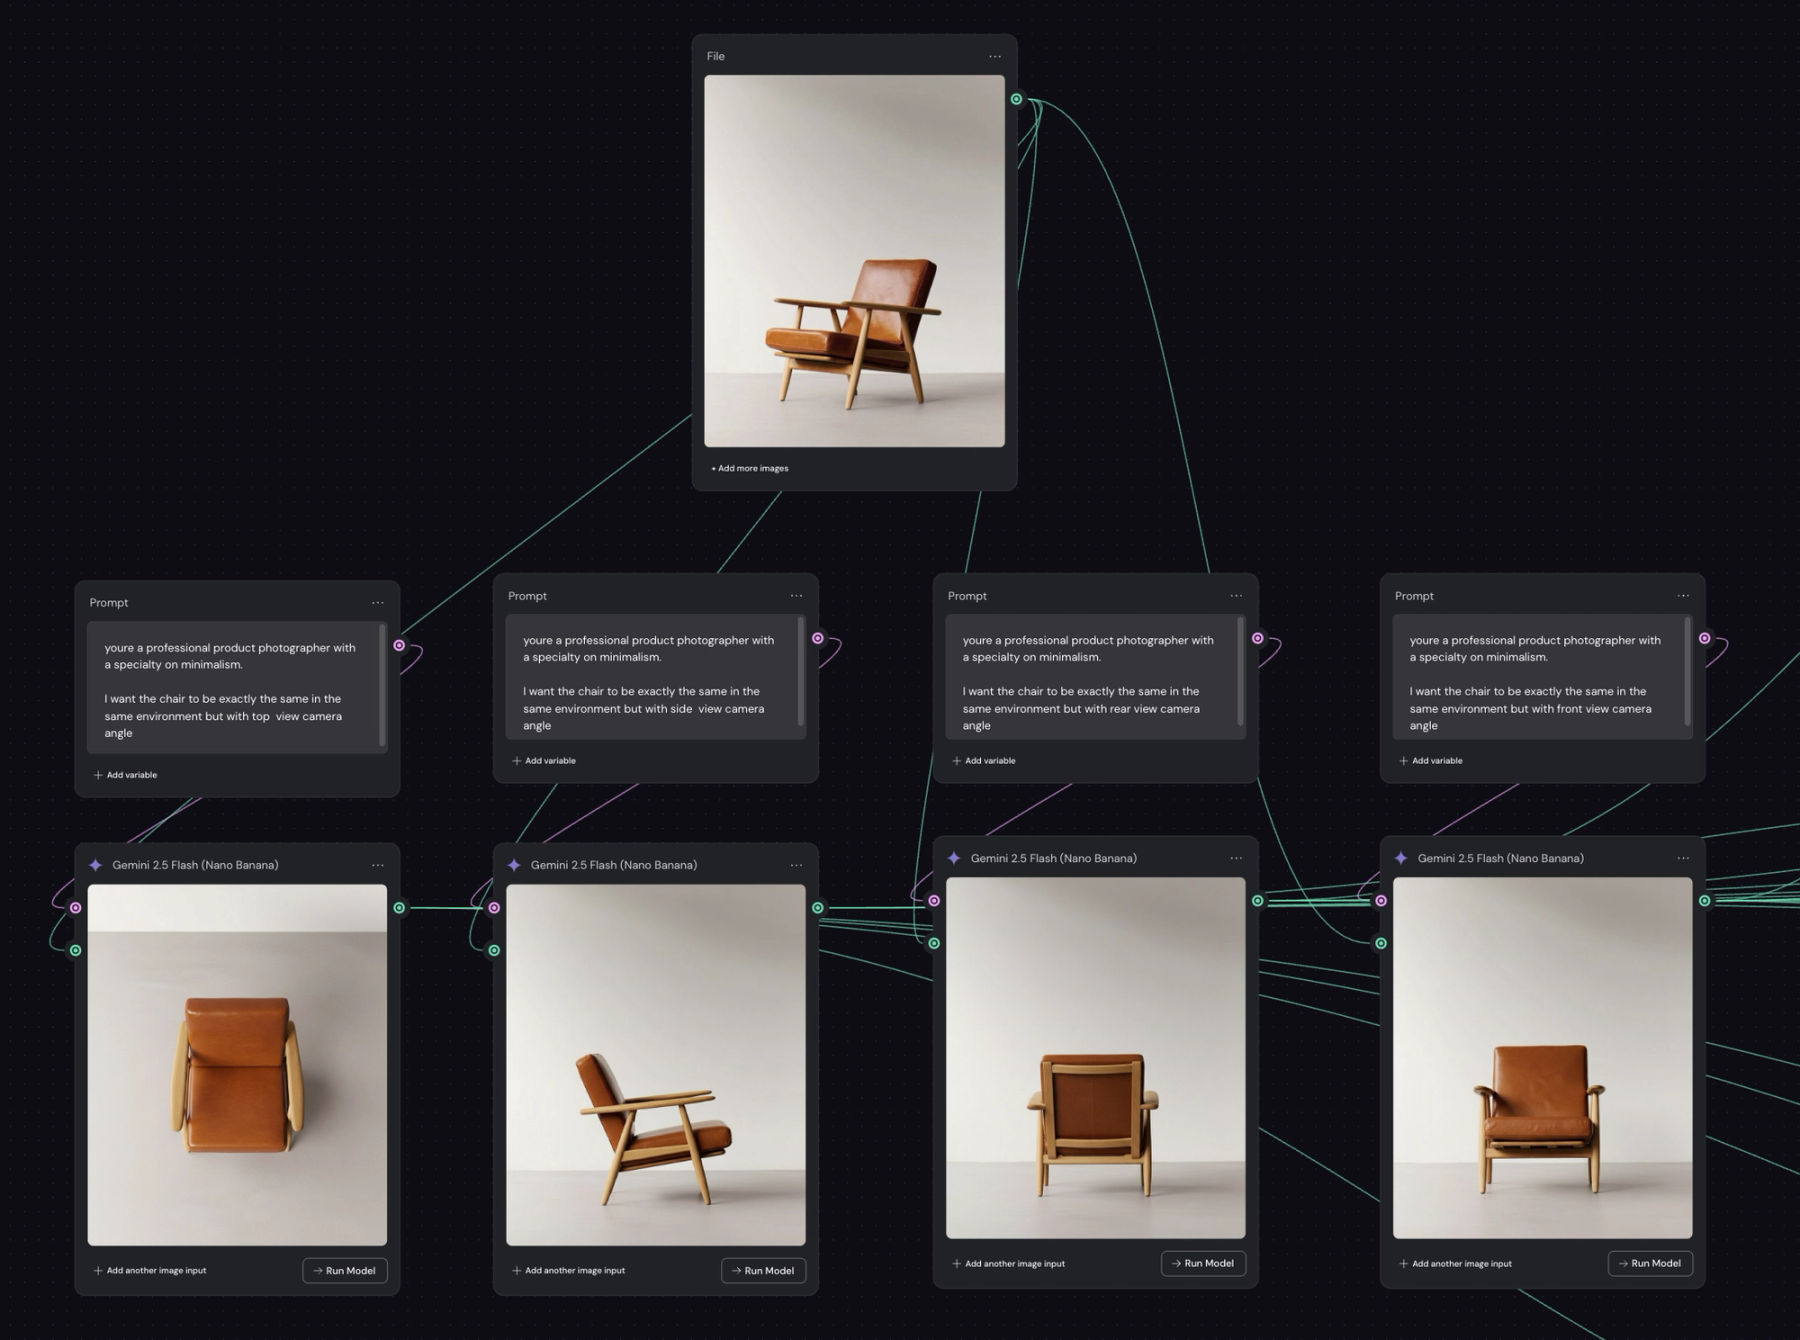
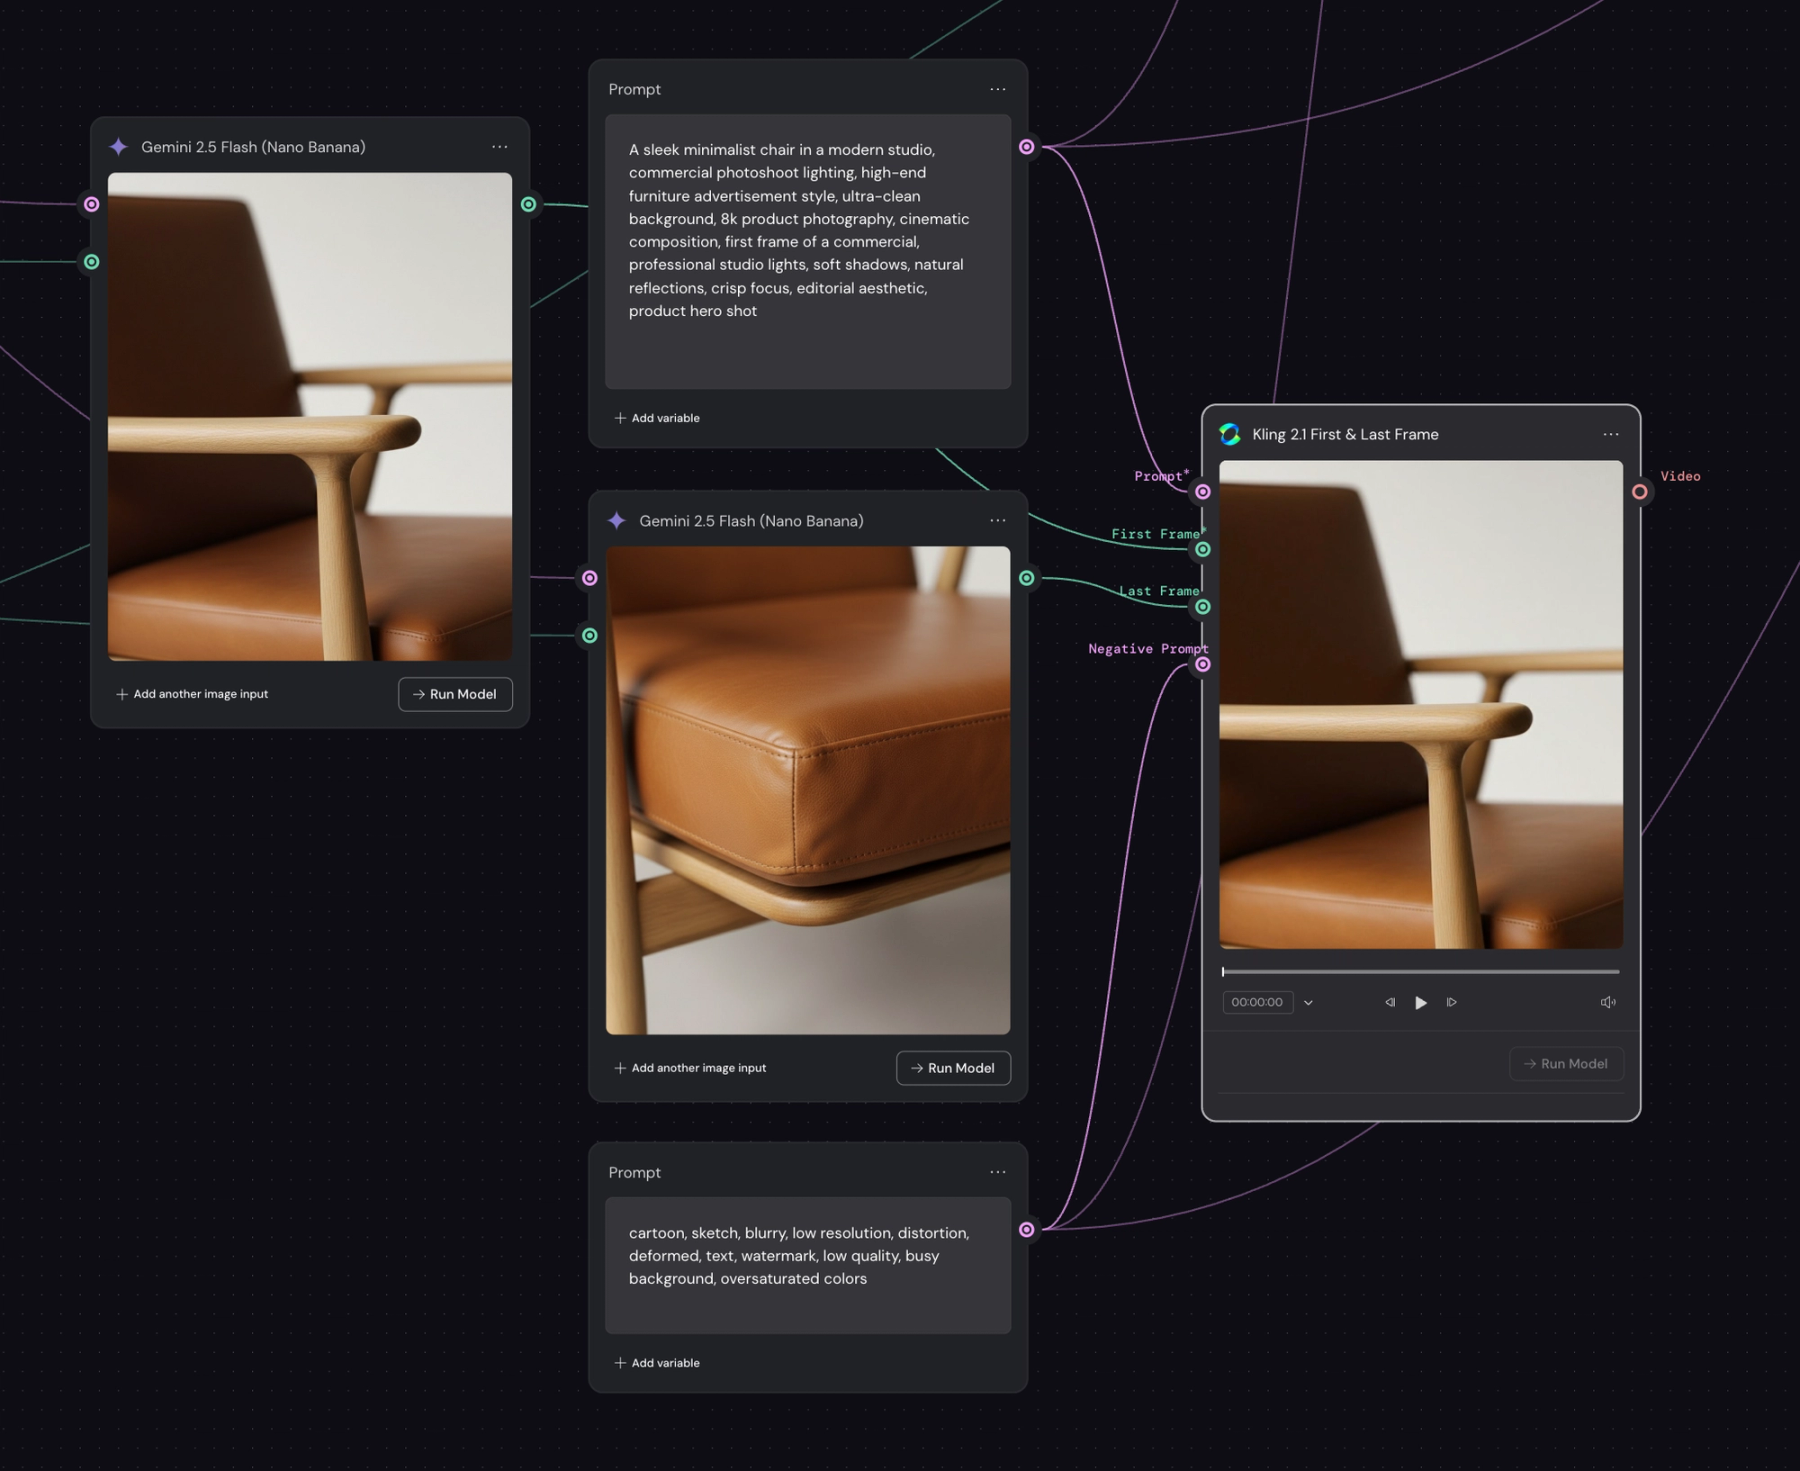
Step 1: Generating Multiple Perspectives Tools Used: Nano Banana (image generation), Technical Prompt Engineering Starting with a single reference image of my sample product, I used technical prompt engineering with Nano Banana to generate four essential angles: The key here was using the reference image as a base to maintain consistency across all generated perspectives. This ensures the product looks identical from every angle—crucial for believability.


Step 2: Creating Shot Lists with GPT-5 Tools Used: GPT-5 For each of the four perspectives, I prompted GPT-5 to generate detailed shot lists that included: Wide shots (establishing the product in context) Close-up shots (highlighting details and features) Each perspective resulted in approximately 3 distinct shot variations, giving me a rich library of potential frames to work with.
Step 3: Generating the Shot List Images Tools Used: Nano Banana, Array Storage System Here's where organization became critical. I created arrays to store each shot list systematically: Wide, Medium and Details I then fed each shot description back into Nano Banana to generate the actual images, maintaining visual consistency with the original reference image throughout.


Step 4: Curating and Upscaling Tools Used: Topaz Labs Not every generated image makes the cut. I carefully selected images that: Had the best composition Worked well together sequentially Maintained consistent lighting and style Once selected, I upscaled these images using Topaz Labs to ensure maximum quality before moving into video generation.

Step 5: Creating Seamless Camera Movement Tools Used: Kling 2.1 Flash (start and end frame feature) This is where the magic happens. Instead of using traditional keyframe animation, I used Kling 2.1 Flash's start and end frame feature—essentially a betweening technique similar to what you'd do in After Effects, but automated by AI. How it works: Set your first frame (starting position) Set your last frame (ending position) Kling generates the smooth transition between them This creates fluid, consistent camera movements that look professionally choreographed. The AI handles all the in-between frames, maintaining visual consistency throughout the motion.
Step 6: Post-Production Polish
Tools Used: Adobe After Effects, Music Selection
The final step is what separates good from great. I imported the rendered video into After Effects to add:
Speed ramping: Varying the playback speed to create dramatic emphasis on certain moments
Timing adjustments: Fine-tuning cuts and transitions
Color grading: Subtle enhancements for mood and consistency
Music selection: Choosing a track that vibes with the visual rhythm
The music choice is crucial—it should complement the pacing and energy of your speed ramps and camera movements.
Real-World Applications
This workflow has practical applications across multiple industries:
- E-commerce: Generate product videos for listings without expensive photoshoots
- Marketing: Create social media content quickly and affordably
- Prototyping: Visualize products that don't physically exist yet
- Portfolio work: Showcase concepts for clients before production
- Small businesses: Access professional-looking content without big budgets
Key Takeaways
What Worked:
- Using a reference image ensures consistency across all generated angles
- Systematic organization (arrays) prevents chaos when managing multiple shots
- The betweening approach with start/end frames is more intuitive than keyframe animation
- Post-production polish is essential—raw AI output needs human creative direction
Lessons Learned:
- Not every AI-generated image will be usable—curation is critical
- The combination of tools matters more than any single tool
- Human creativity and decision-making remain irreplaceable in the process
Conclusion
This experiment with Weavy AI and complementary tools proved that AI-powered product visualization is not just possible—it's practical. While it requires multiple tools and steps, the workflow is more accessible and affordable than traditional production methods.
The key insight? AI tools are most powerful when combined thoughtfully with human creativity and technical knowledge. The AI handles the heavy lifting of generation, but the human directs the vision, curates the results, and adds the finishing touches that make content truly compelling.
As these tools continue to evolve, I'm excited to see how workflows like this become more streamlined and accessible to creators of all skill levels.
Tools Used in This Workflow:
- Nano Banana (image generation)
- GPT-5 (shot list creation)
- Topaz Labs (upscaling)
- Kling 2.1 Flash (video generation)
- Adobe After Effects (post-production)
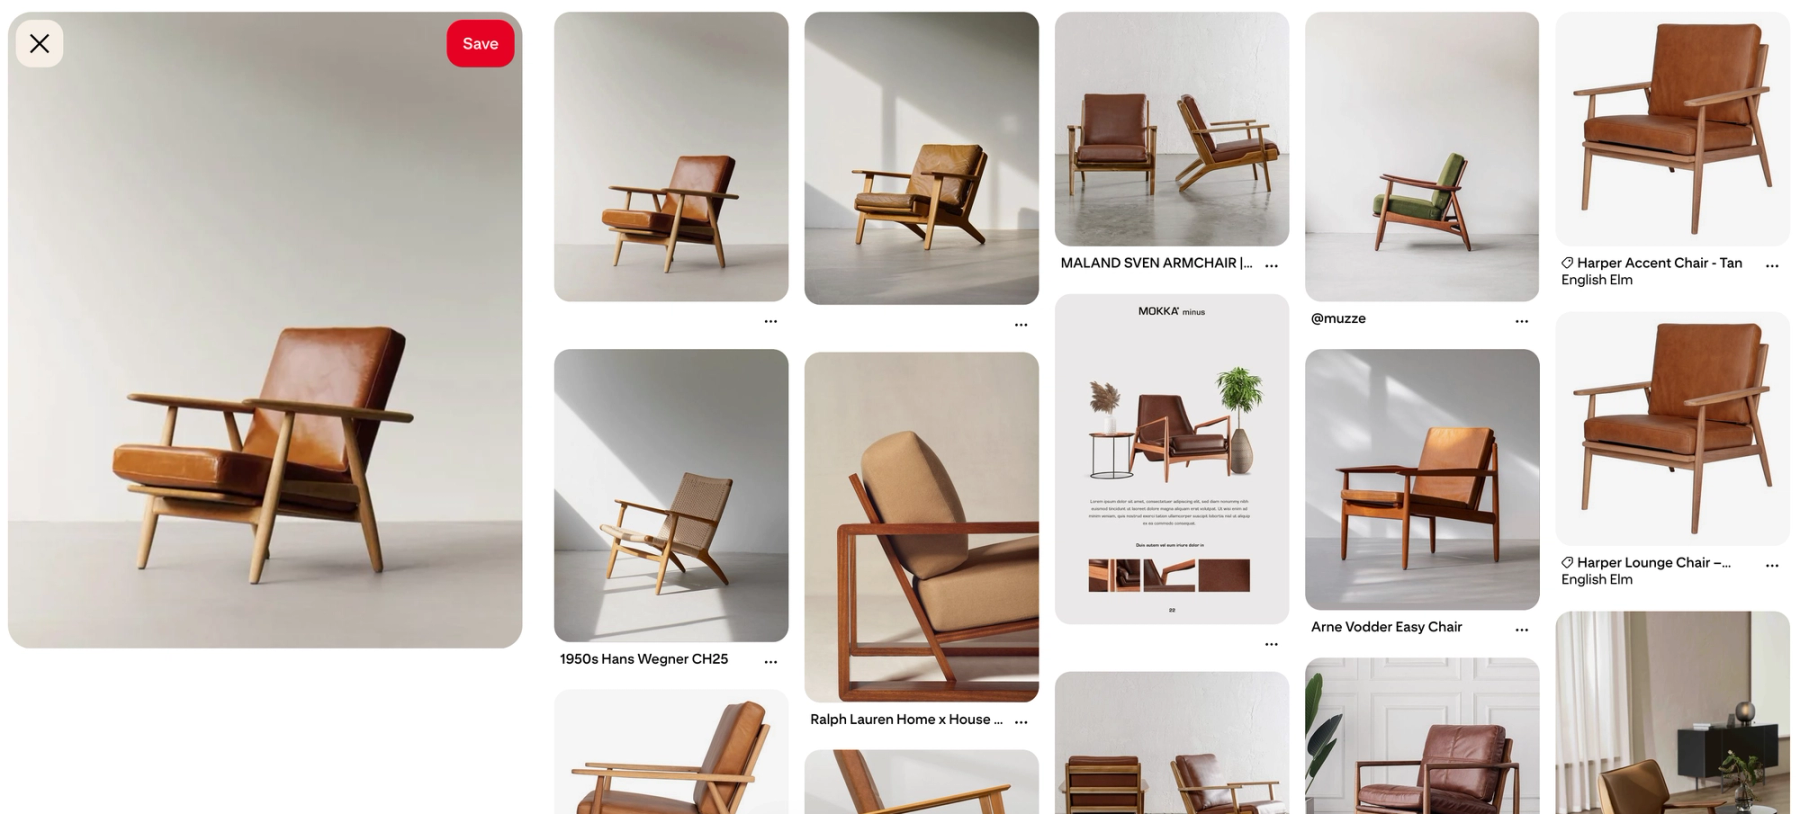
- Image Reference (Pinterest)